You are currently browsing the tag archive for the ‘vegan cake’ tag.

Have you seen My Neighbor Totoro? I hope so. If not, please do. It’s the cutest movie EVER. Our daughter loves it, which pleases me greatly… because I’ve dreamed of throwing a Totoro themed birthday party since the time she was just a twinkle in our eyes.

Here are a few pictures of the simple Totoro-themed party that we threw for Cleo’s 2nd birthday party. Everything came together in the end very nicely, with a lot of help from grandparents and friends. We planned a late morning party, so we just had cake and coffee. It was really nice to have coffee talk with friends in the park before the day got too warm.
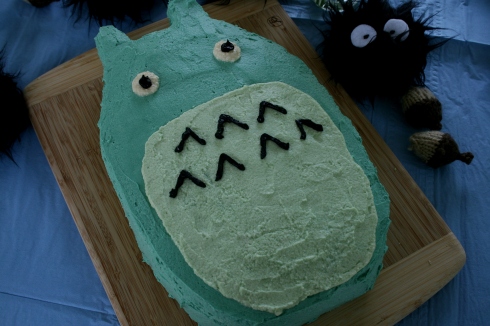
Look at the great cake that my friend Vince helped me make! Actually, this one I did by myself, but he came over and helped me make a trial run cake. The vegan “buttercream” frosting recipe (see below) that he came up with looked better than this one did, but it was so very tasty. I used a Dr. Oetker’s lemon cake mix, and instead of using eggs, I substituted 1 tablespoon flax meal mixed with 3 tablespoons warm water for each egg, which is turning out to be my favorite egg substitute. It came out really well! There’s also a layer of organic blueberry jam in there between the cake layers serving as the filling. One of our guests wondered why I decided to make a cake that wasn’t vegan. He looked pretty surprised that it actually was. And there was barely enough for all of the guests. Oops.

Vegan Buttercream Frosting
1 c Earth Balance margarine, at room temperature
3 c vegan confectioner’s sugar
1-3 tbsp soy milk
1 tsp vanilla (Vince suggested flavoring it with fresh grated ginger! It was really good, but didn’t play well with the cake flavors we had planned here)
food color

Using a hand mixer, beat the margarine until fluffy. Slowly add the sugar; it’ll be crumbly. Add a tablespoon of soy milk and mix, adding more if necessary. Add vanilla, mix more. If you need more liquid, by all means, add more, but slowly. If desired, add food color. Now get to decorating! Makes about 3 1/2 cups.

Soot Sprites are abundant in Totoro’s neighborhood.

I made about 40 of them, with fuzzy faux fur, felt for eyes affixed with embroidery thread. Very simple, too (see my instructions, below, to make your very own). Making them was a lot of fun, but seeing the looks on people’s faces when presented with one was even better.

To make the Soot Sprites, trace 5″ circles (coasters work really well as a pattern here), and cut out 2 pieces for each sprite. The eyes are patterned by a quarter, and then use embroidery thread to affix them in a star pattern to one of the faux fur pieces (if you’re into that. Dots would work too). After attaching the eyes, place the faux fur pieces right sides together, and tuck the furry ends in toward the middle of the sprite so that you don’t see any fur sticking out. Pin the pieces together. Stitch around the edges (if you use a sewing machine for this, you will want a bigger needle and a longer stitch length. And you’ll also want to dust it out really well after this project. If you’ve seen the movie, you know that Soot Sprites can be messy!), leaving about a half inch seam allowance. Be sure to leave a 2-inch opening! Turn the sprite right-side-out, and stuff with the stuffing of your choice. They would make really great bean bags, but I opted for stuffing. Light and fluffy! Hand stitch them up. Voila! A Soot Sprite is born!

Acorns!

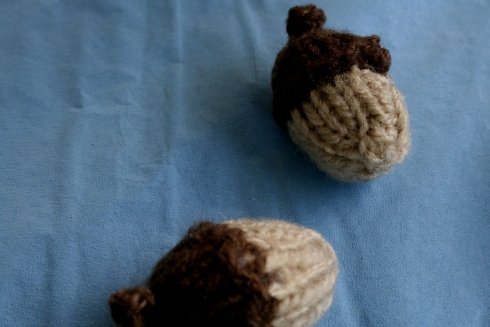
Acorns and seeds play a part in Totoro too. Cleo’s grandmother was so generous with her time and made a bunch of these! They’re about 2 inches from end to end, and made with such care. She is a crafty lady, and I think she really enjoyed the challenge of working on something so small, using a new pattern, and making them just right. She made almost 30 of them, and they’re amazing. They still sit up on our bookshelf to be admired. Here is the pattern she ended up using. There are a LOT of cute things going on on that site. I might have to learn to knit. Again.

It wouldn’t be a party without treat bags…

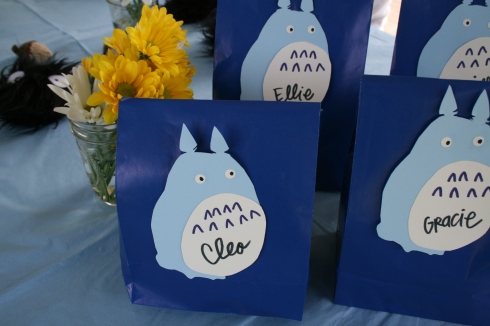
And our young guests seemed to enjoy them greatly. They’re just basic paper gift bags, filled with bubbles, Soot Sprites, the fabulous knitted acorns, and some stickers. The Totoros are made from heavy duty scrap booking paper. I sketched my basicĀ  Totoro shape on one, cut it out, and then traced it to make some clones. I kept it very basic. Less is more, and when you try to do details on a reproduction, it looks so much more… reproduced. I did the same with the Totoro tummy, and then used a hole punch to do the eyes. After gluing them all together, I just used a felt pen to put on the finishing touches and customize them with the guest’s name. Finally, tape the Totoro to the full treat bag, and you’re done!
Our adult guests didn’t go home empty handed though. The night before, I cut down some flowers I got in bunches at the grocery store and grouped them in half-pint mason jars. So cute! I chose jars that would fit into a car’s cup holder. I’d hate for our party favors be remembered for the mess they made and not for the cuteness of the event!

Thanks to all of the help that we had, I was able to arrive at the party site just half an hour before the party started to unload everything. I enlisted a few friends to help with the tablecloths on the picnic table, and to arrange the decorations on top of them. My parents brought a huge party pot of organic coffee from a local roaster and coffee house, and I set up a little coffee station with a selection of vegan creamers and sweeteners. This party was a true lesson in keeping things simple so as to truly enjoy the day.
Here’s one of my favorite moments from the party- Cleo walking with my dad. At first she was really wobbly while maneuvering the perimeter of the now-unused wading pool at the park. By the time she got halfway around, she was feeling pretty confident; by the time she’d lapped it, she wasn’t even thinking about it anymore. She’s growing up so fast!

Happy Birthday Cleo. Next year you can pick out your party theme. xoxo Mommy

from The Garden of Vegan by Tanya Barnard and Sarah Kramer

Decadent Brownies

1 1/2 c flour
1/2 c cocoa powder
3/4 c dry sweetener
1 1/2 tsp baking soda
3/4 tsp baking powder
1/2 tsp salt
1 1/2 c soy milk
1/3 c olive oil
1/2 c nuts (your choice), chopped

Preheat oven to 350F. In a large bowl, sift together the flour, cocoa, sweetener, baking soda, baking powder, and salt. Add the soy milk, oil, and nuts. Stir gently until “just mixed.” Pour mixture into a lightly oiled 8×8 baking pan, and bake for 30-35 minutes or until a toothpick comes out clean. Makes 8-16 brownies, depending on how you cut them.

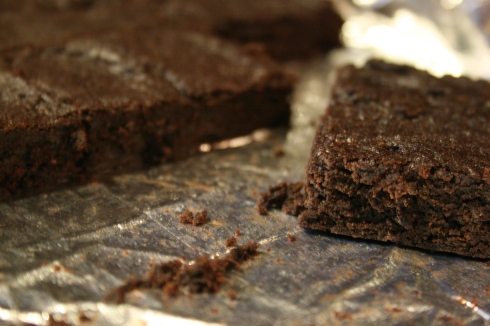
I didn’t set out to make two batches of brownies… it’s just that the first recipe really didn’t scratch the brownie itch I was feeling. Don’t get me wrong, the above recipe was indeed tasty and well received by my house guests, but they were too cakey for this dense brownie lovin’ girl. They were just like chocolate cake… granted I haven’t made a lot of brownies in my life, but would you peep that tower of a brownie? Looming over my Coconut Bliss was not how I’d pictured my dessert. I opted out of the nut invitation, due to allergies among our guests, and they were still tasty. I would definitely return to this recipe when seeking out a smaller chocolate cake. On to the batch of brownies I made later that week for a friend’s birthday celebration:

from Vegan Cookies Invade Your Cookie Jar by Isa Chandra Moskowitz and Terry Hope Romero

Midnight Brownies (a variation of the Espresso Fudge Brownies recipe)

3 oz semisweet baking chocolate, chopped
5 tbsp nonhydrogenated margarine (like Earth Balance)
2/3 c sugar
1/3 c nondairy milk
1 tbsp cornstarch
1 tsp vanilla
3/4 c plus 2 tbsp all-purpose flour
1/2 tsp baking powder
1 tbsp Dutch cocoa powder
2 tbsp black cocoa powder (I couldn’t find this so I used regular cocoa powder)
a pinch of salt

Line an 8×8-inch square metal brownie pan with enough aluminum foil so that it folds over the sides of the pan by about an inch. Spray the bottom of the covered pan with a little nonstick cooking spray. Preheat oven to 350F.

Place the chocolate and margarine in a large glass mixing bowl. Microwave at 50 percent power for 1 1/2 to 2 minutes until the chocolate is soft enough to melt into the melted margarine when stirred with a rubber spatula. Stir until smooth, add the sugar, and stir again to combine.

In a liquid measuring cup, vigorously whisk together the nondairy milk, cornstarch, and vanilla until foamy. Stir this into the chocolate mixture, using the rubber spatula, until completely combined. Sift in the flour, baking powder, cocoa powder, and salt and fold into the chocolate mixture until moistened. A few small lumps are okay; do not over-mix. Scrape the batter- getting as much as possible- into the prepared pan and smooth it out evenly to the edges of the pan.

Bake for 22 to 24 minutes or until a toothpick inserted into the center of the brownies comes out mostly clean with a few moist crumbs (but no gooey batter). Place pan on a wire rack to cool for at least 30 minutes, if possible allowing the brownies to cool completely before serving. Slice into 12 brownies. Store in a tightly covered container.

Now THESE are what I was after. No cakiness here, the few crumbs are sticky and dense. No frosting or Coconut Bliss needed (though still welcomed. Especially heavenly with this, ungh!). And they would be really good with walnuts, if that happens to be your style. Next time I might try the mint variation offered.
This was quite the learning experience- comparing the recipes is really interesting to me- the wet to dry ingredient ratio should have been more obvious to me, but now I know! Each brownie had her strengths. Tall girl was great for soaking up her melting toppings, whereas Shortie satisfied me like the many slices of berry pie, oranges and tall glasses of herbal iced tea did while I was pregnant. And if you’ve ever been pregnant…